Guest Post by Lori lei
Lori is a Pinterest Strategist and Manager who owns Planner Wishes by Lori. She provides solopreneurs and entrepreneurs information and tips to gain organic traffic using Pinterest strategies tailored to their business. She’s a mom, and a wife, and lives in paradise-Hawai’i.
At some point in your blogging journey, you’ll want to promote your blog in some way, shape or form. One of the most popular (and free!) ways to do this is by using Pinterest. Pinterest is a great platform to drive organic traffic to your blog if done the right way.
After setting up an account, you’ll want to verify it. Verifying your account allows others to see it as a trusted source. This is important to establish credibility in your niche.
There are many ways to verify your Pinterest as a trusted source. However, I’m all about keeping things simple so I am going to show you the EASIEST ways you can verify. 3 involve plugins (one or so you may already have), and one that involves coding. You only need to choose one method.
This post may contain affiliate links, and while it won’t cost you anything extra, if you make a purchase through my link I may make a commission. Read my disclaimer here.

How To Verify Your Pinterest 3 Ways
NOTE: you will need a Pinterest Business account to do this.
Step 1: Go to your Pinterest account>settings (3 dots in the upper right corner)>claim. Add your website URL and click claim.
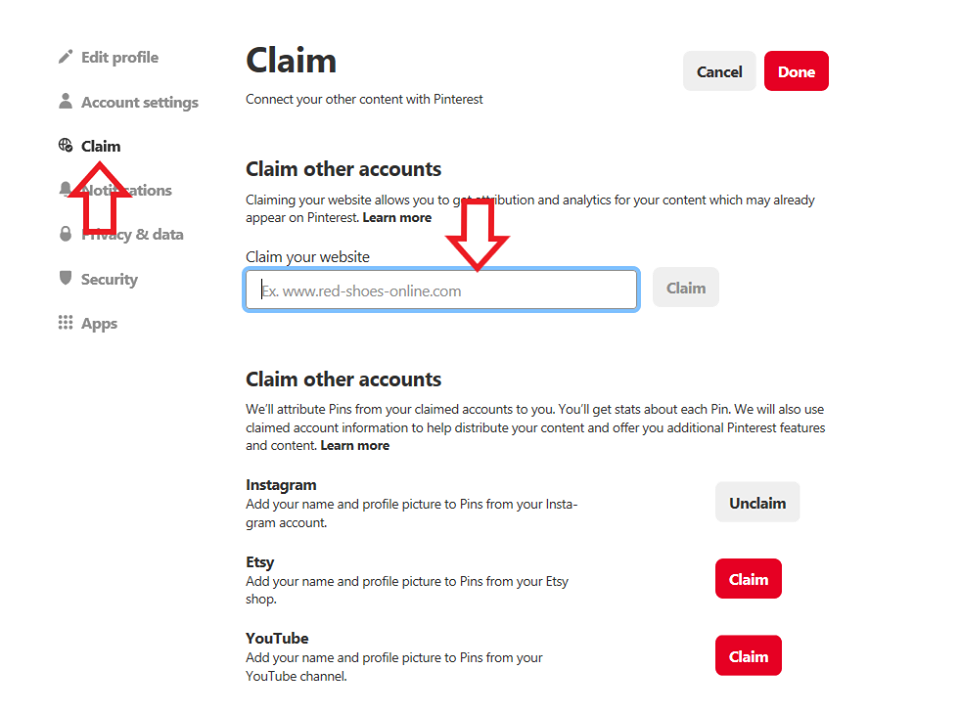
Step 2: When you add your website URL, it will ask you to pick a claim option. You can either add an HTML tag or upload an HTML file.
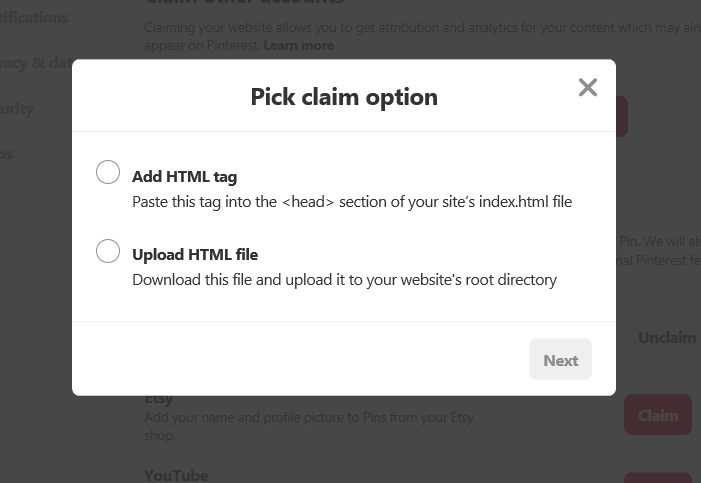
IF YOU CHOOSE ADD HTML TAG:
1.) Using Plugins
a.) Pinterest Verify (verify Pinterest using meta tag; no coding required)
- In another tab/window, log in to your WordPress site, download the “Pinterest Verify” plugin & activate
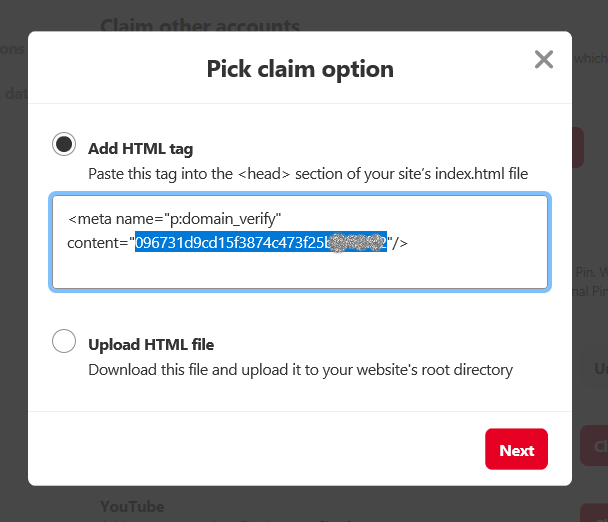
- Go back to the tab/window with your HTML tag. Highlight the NUMBERS ONLY of the tag and copy them
- Head back to the Pinterest Verify plugin and paste your meta tag in the verification code box. Click “save changes” button.
*Please note that all of these steps (along with screenshots) are listed in the Pinterest Verify plugin settings.
- Go back to your Pinterest account and click “next” on the screen with your meta tag. You will get an email in the next day or so, once Pinterest verifies your tag was correctly inputted.
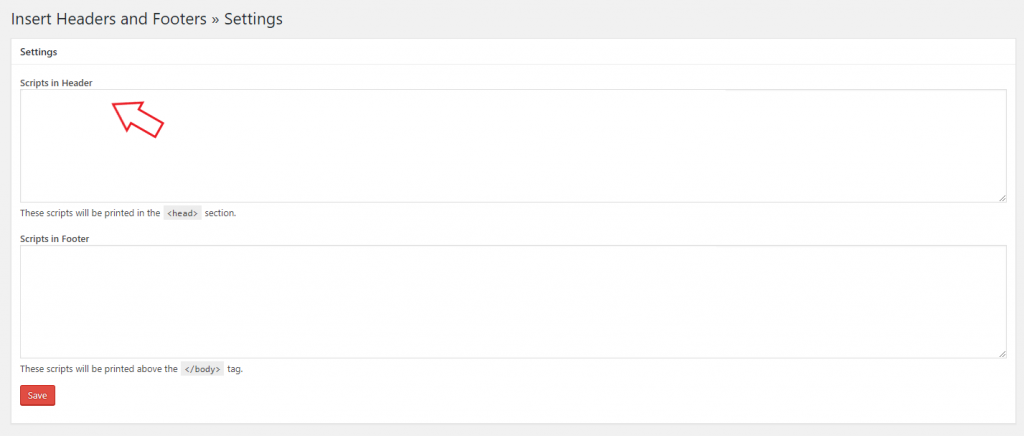
b.) Insert Headers & Footers (allows you to insert code or text into the header or footer of your WordPress blog)
- In another tab/window, log in to your WordPress site, download the Insert Headers & Footers plugin & activate
- Go back to the tab/window with your HTML tag. Copy the entire tag.
- Head back to the plugin (left panel, in settings), and paste the tag into the top box (scripts in header). Click the ”save’ button.
- Go back to your Pinterest account and click “next” on the screen with your meta tag. You will get an email in the next day or so, once Pinterest verifies your tag was correctly inputted.
c.) YoastSEO
- In another tab/window, log in to your WordPress site, download the YoastSEO plugin & activate
- Click plugin – left panel>SEO>social>Pinterest and add meta tag
- Click “save changes”
- Go back to your Pinterest account and click “next” on the screen with your meta tag. You will get an email in the next day or so, once Pinterest verifies your tag was correctly inputted.
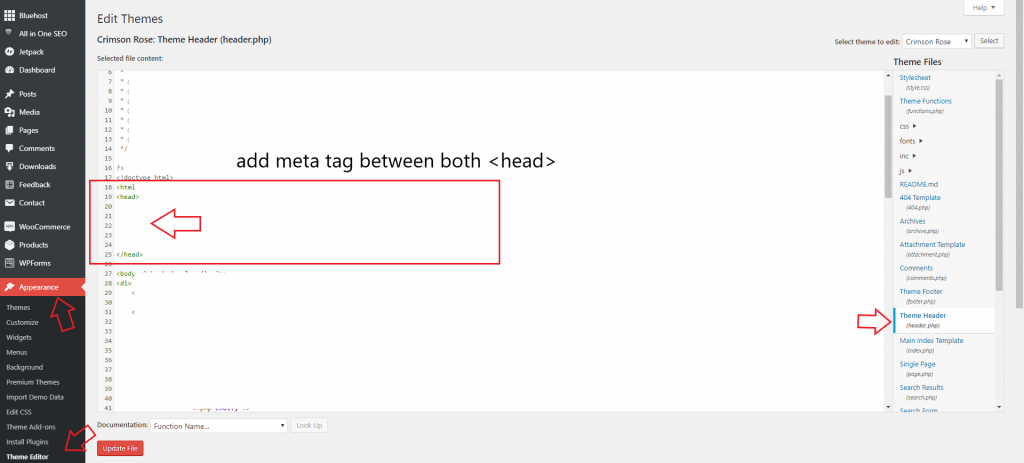
2.) Through index (**please only take these steps if you’re confident with editing code. One wrong move and you may damage your website.**)
a.) Head to your website’s index.html (for WordPress this is most likely found in Appearance>editor or theme editor (depending on your theme).
b.) You will see a bunch of code in front of you. This is the code for your website. You want to be in the header.php area. See graphic for an example.
c.) Click “save”.
Summary
As you can see, plugins make verifying your website/ Pinterest account EXTRA easy! It is a one-time process, so once you’ve set it up, your account will be forever verified (unless you delete the plugins or change your Pinterest site). As mentioned before, verifying your account allows you to gain some credibility, and allow extra features to pop up when you create or save pins from your website.
Along with credibility, you will gain valuable analytics about your site, such as how much traffic you get from Pinterest, what pin styles are working, etc. You also get deeper analytics when you use Tailwind. (affiliate link)